
Here is How I turned a half demolished shed into a practical and pretty DIY Potting Shelter. Costing a grand total of £15, I used free materials like pallet wood and repurposed and recycled where I could, read on to see how I did it.

Saved from the Landfill!
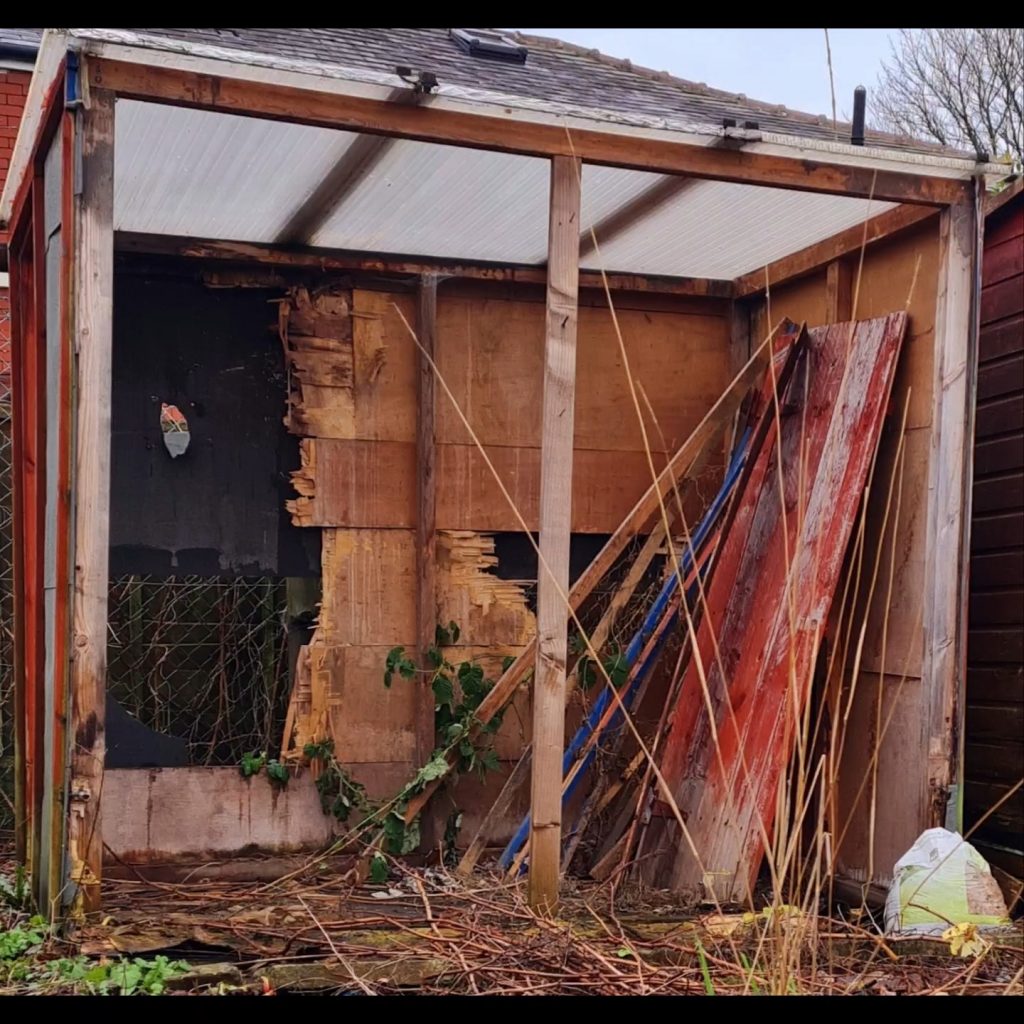
When I took on my Allotment plot, I also inherited a partly demolished Shed. It seems the last occupier of the plot ran out of steam half way through the annihilation and promptly abandoned it. The shed obviously couldn’t stay the way it was and I didn’t want to be wasteful and simply cast it onto the bonfire. There was no rot to speak of, what remained seemed to be structurally okay, it just needed a little reinforcement and a purpose.
Enter Kelly!…Yay! A project! I do love a makeover! Take a look at my Greenhouse Makeover too!
Where to Start?
First I got rid of the parts that could not be saved, the back boards for example were Jagged splints, no amount of wood filler or good will, would save them now! So off they came…
Next, we looked at how we could reinforce the frame, we did this by removing the central wood beam, we then cut it and fashioned 2 corner supports to stabilise the structure.

Bargain Hunting!
Once the Structure was stabilised we started work on filling the gaps. The back wall needed replacing, I didn’t have the budget for new timber, nor could I fill it with cheap mdf type wood, it needed to be robust enough to take a beating from the British weather. If I wanted it to survive more than 1 winter, I had to use something a lot more sturdy. As luck would have it, a listing of Facebook Market Place saved the day, ‘Solid wood Doors £5 each, buyer collects’.

Recycled wall!
I measured the back wall and calculated that we would need 3. We had to cut around 3 inches off the side of one of the doors, and trim all of them down by 2 inches. Next was to simply screw the doors to the frame ( screwed from the top and bottom, and door to door). We also gave the doors a little extra weather protection by fixing Roofing felt to the back of them (This cost us nothing, a friend kindly donated a left over roll)
DIY Potting Bench
Let me draw your attention to the circled area below. This sad abandoned slab of wood hidden amongst the Cr*p, would turn out to be the Old Shed Door. A shed door that would soon be upcycled into a potting bench.

A Lucky Find!
A free material that requires nothing but a little imagination! I even made use of the hinges that were still attached to the door. By screwing the hinges to the back wall, the whole DIY Bench can be lifted to gain easy access to the storage space beneath
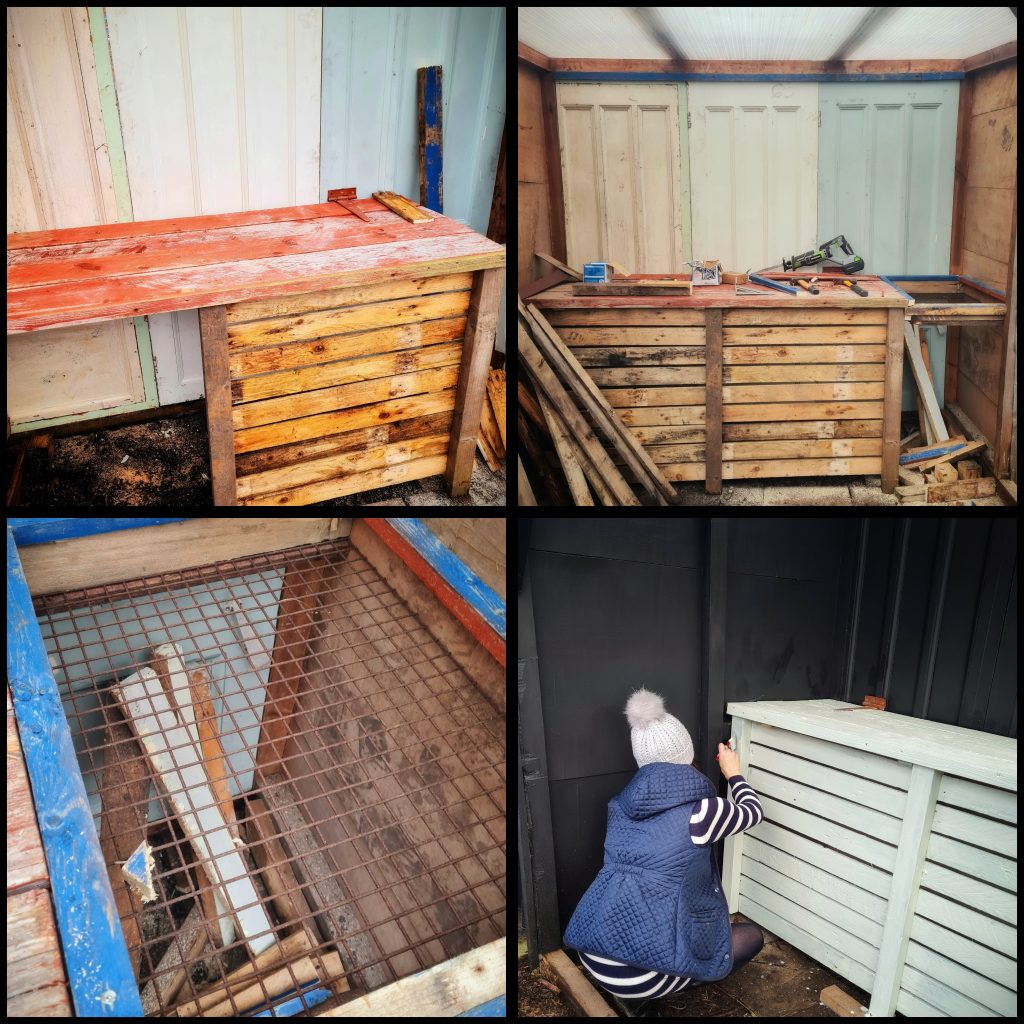
The next part was to attach the Potting Bench legs (the legs were wood offcuts abandoned on the plot) We then used Pallet wood to span the gaps between the legs by screwing rows of Pallet planks between each void.
DIY Vegetable Washing Station
The metal grill above was another scrap material I came across on the plot, we fashioned a recessed section beside the DIY Potting Bench and attached the metal grill ( a bucket is placed underneath to catch any water) This was an ideal solution for us, saving us the mess of bringing dirty vegetables into the house. They can be hosed down in the potting shelter and taken home clean.
Access Door
Using Pallet wood we made a small door beneath the Vegetable washing area, this is for easy access to the water collected from washing the vegetables. The water is then poured into a watering can and used to water the garden.

DIY Shelf
We found this old shelving Unit in the small shed that came with the plot. We took it apart and constructed one large shelf from the planks. We painted it in Black Jack, and sprayed some old shelf hinges Black.

Potting Shelter Styling
The fun Part! Making my DIY Potting Shelter beautiful! I had so much fun with this project. When I look back at what it was, and then, at what it became, I am incredibly happy that it didn’t go on the bonfire! More than anything I’m pleased as punch that I managed to do it at such a tiny cost!

Contrasting Colours
Black is perhaps not the first colour that springs to mind when picking colours for a small space, however, I didn’t want it to blend in with the surroundings, but stand out! Having an open aspect frontage, lots of natural light and a dominating Potting Bench. I decided that the the use of bold and gentle colours would elevate the space and draw the eye to the lines of the bench and the panels on the wall, a pleasing marriage of two very different hues, creating a wonderful back drop for the pots and tools it houses. See below for the paint colours I used.
Paint
Walls- Black Jack
Potting Bench – Fresh Rosemary