This Post May Contain Affiliate links please dee my disclosure policy
This DIY Tabletop Christmas Tree is so easy to make, costs very little and is incredibly beautiful! A whimsical, magical woodland look Christmas tree, perfect if you’re short on space or an ideal table centrepiece. Follow my step-by-step instructions to make your very own Foraged Tabletop Christmas Tree.

I do love a Forage! This Tabletop Christmas tree was born from a pile of discarded hedge Cuttings. As I was wandering in the woods, I found a mound of freshly cut Lawsons Cypress Hedging. It was meant to be! The universe somehow knew I’d be foraging that day and sent a fresh pile of luscious free foliage just for me. I hit the Jackpot; Nature provides!
Foraging Etiquette
There are some rules you should abide by if you intend to forage for food, or for foliage.
Only take what you need-Take no more than you plan to consume or use and try to forage over a wide area rather than picking from one patch. Make sure you’re foraging doesn’t disturb the habitats and environments of the local wildlife.
Leave No trace– Leaving no trace of your presence is a sign you have foraged responsibly. Do not trample or disturb roots and only take when there is an abundance of your chosen food or foliage. This allows the plants to replenish and renew.
Don’t Pick from Private land – If you intend to, be sure to get permission first.
Only Pick from Clean areas – Avoid Roadsides, Industrial areas & Top tip* Foraging from the base of a tree for example would not be wise, the likeliness of a dog previously cocking its leg there…is high! If you intend to consume what you have foraged, wash first.

How to Make a Tabletop Christmas Tree
(Instructions and Video on the DIY Card at the end of the post)
Materials
Affiliate Links
- 1 X 13cm Coir Pot – My Favourite environmentally friendly Coir pots, so beautifully rustic too!
- 1 X Floral Foam Brick
- 1 X Stick approx. 60 cm in length- Ant sturdy dry stick will do, mine was cut from an old Christmas tree
- 1 X Length of Green Tinsel
- Florist Wire
- Cypress Branches – Or any other evergreen Foliage, most hedge cuttings would be suitable for this project. Or You could Use Christmas tree branches, Nordman fir etc
- Skimmia
- Dried Beans
- Glue Gun

Instructions
- Add some stones/ pebbles to the bottom of the Coir Pot, this is to weigh down the base, so the tree doesn’t topple over.
- Cut some floral foam to fill the inside of the coir pot (as snug as possible, you want a really tight fit to help the stick stay in place)
- Be sure to choose a sturdy solid stick approx. 60cm long
- Insert the stick into the centre of the foam, I did it by gently twisting the stick (in a corkscrew fashion) until it reaches the bottom of the pot.
- For extra sturdiness I applied some hot glue around the stick as it enters the foam
- Top with some dried beans to hide the green foam

- Wrap the top half of the Stick with Green tinsel (this offers a little extra padding for a fuller looking tree) see video
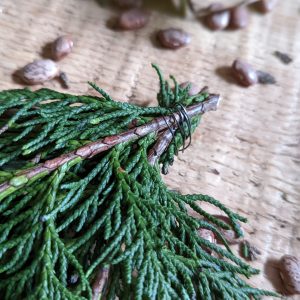
- Next, select 40 branches, then bind them in sets of 2. Secure them with florist wire.
- You will end up with 20 Sprigs of hand tied foliage.

- Create the bottom layer of your tree by securing sprigs of foliage to the bottom half of the tinsel covered portion with Florist wire, continue all the way around (see video on the ‘How to’ at the end)
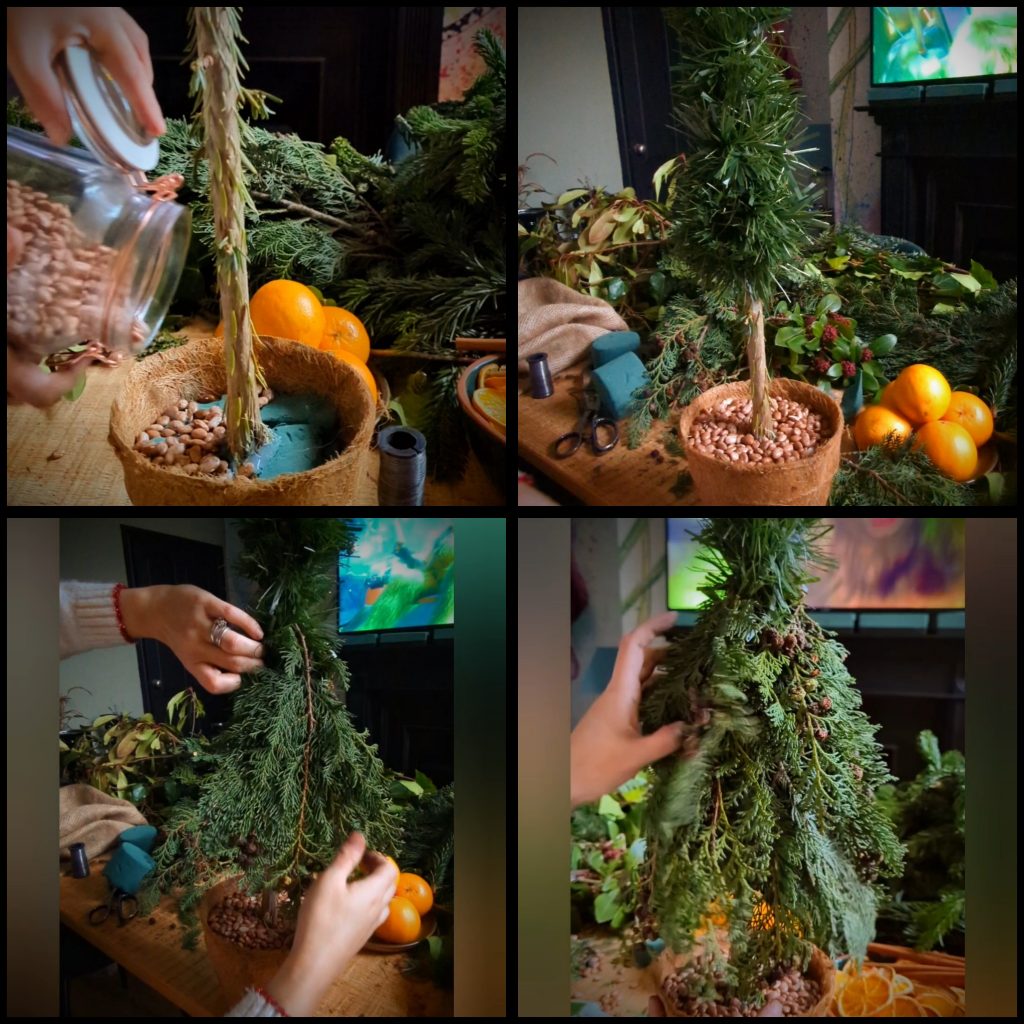
- Repeat this process a total of three times, moving a little further up the stick each time, until you reach the top. Layering the sections to create a full realistic looking tree.

Why You’ll love This DIY Tabletop Christmas tree
Affordable– Made with Foraged Foliage and affordable materials
Easy– Not technically difficult at all, you’re basically just tying foliage to a post!
Beautiful– I mean, Come on? It’s a bit of a looker isn’t it!
Filled with Christmas Spirit! – As you can see from the video and The Grinch movie playing in the background, it really got me in the Christmas Spirit!
Impressive – Looks way harder than it is, your guests will be so impressed with your crafting skills! You could even make these as gifts!
Did You Make This DIY Tabletop Christmas Tree? If so, please leave a rating and comment below. Did you take a picture? Great! Tag me on Instagram, I love sharing your creations on my stories

DIY Tabletop Christmas Tree
Materials
- 1 X 13cm Coir Pot
- 1 X Floral Foam Brick
- 1 X Stick approx. 60 cm in length
- 1 X Length of Green Tinsel
- Florist Wire
- Cypress Branches
- Skimmia
- Glue Gun
- Dried Beans
Instructions
- Add some stones/ pebbles to the bottom of the Coir Pot, this is to weigh down the base, so the tree doesn't topple over.
- Cut some floral foam to fill the inside of the coir pot (as snug as possible, you want a really tight fit to help the stick stay in place)
- Be sure to choose a sturdy solid stick approx. 60cm long
- Insert the stick into the centre of the foam, I did it by gently twisting the stick (in a corkscrew fashion) until it reaches the bottom of the pot.
- For extra sturdiness I applied some hot glue around the stick as it enters the foam
- Wrap the top half of the Stick with Green tinsel (this offers a little extra padding for a fuller looking tree) see video
- Next, select 40 branches, then bind them in sets of 2. Secure them with florist wire.

- You will end up with 20 Sprigs of hand tied foliage.

- Create the bottom layer of your tree by securing sprigs of foliage to the bottom half of the tinsel covered portion with Florist wire, continue all the way around (see video)

- Repeat this process a total of three times, moving a little further up the stick each time, until you reach the top. Layering the sections to create a full realistic looking tree.
- Top of with a sprig of Skimmia, Holly and Berrries…or any topper of your choice.