
This DIY Crazy Paving Path is brought to you by the kindness of neighbours! More accurately, Allotment neighbours. See how I turned a pile of Free Broken flags into a whimsical, cottage style Crazy Paving Grass path.

The Allotment
This Grass veined Path is on my Allotment Plot. If you are unfamiliar with what an Allotment Plot is, it is basically a rented patch of land, tended for the purpose of growing vegetables, herbs and whatever else makes you happy! See my Shed of the Year Post
Since I do not own this land but merely rent it, I dont throw a lot of money at it…everything is either, repurposed, recycled or free, See my Potting Shelter post. Now, does that mean it can’t be pretty? Hell No! I feel I have mastered the art of frugality! If there is a way to produce a high end look for a low end price, you can bet i’ll find a way!
That Pinterest Look
Ah Pinterest…love it dont we? It is equal amounts Inspiring and Jealousy inducing. Intricate expensive stone pathways, rose covered Oak verandas and white picket fences. I tell you now, I can’t afford that aesthetic! And most importantly, I wouldn’t spend it, even if I could. Why? Because I enjoy the labour of creating my own version of it. I get a huge amount of satisfaction from getting my hands dirty, making it happen myself, and saving a few quid too!
What You’ll need for a Crazy Paving Path
There is no secret to this path, it really is as simple as it looks! Here’s a few things you’ll need to create your own Crazy Paving Grass Path.
- Broken Paving Flags
- Wheelbarrow
- Yard Brush
- Lump Hammer
- Chisel
- Grass seed
- Top Soil (Or any Old Soil you have to hand)
Crazy Paving Base
When Laying Crazy Paving, in most cases you need to lay a cement base, I didn’t do that! You could also, as a cheaper alternative, lay a sand base, I didn’t do that either! I’m all about the budget, especially at the Allotment, so I skipped the base and hoped it would be fine, as it turned out…it was!
Grass Lines
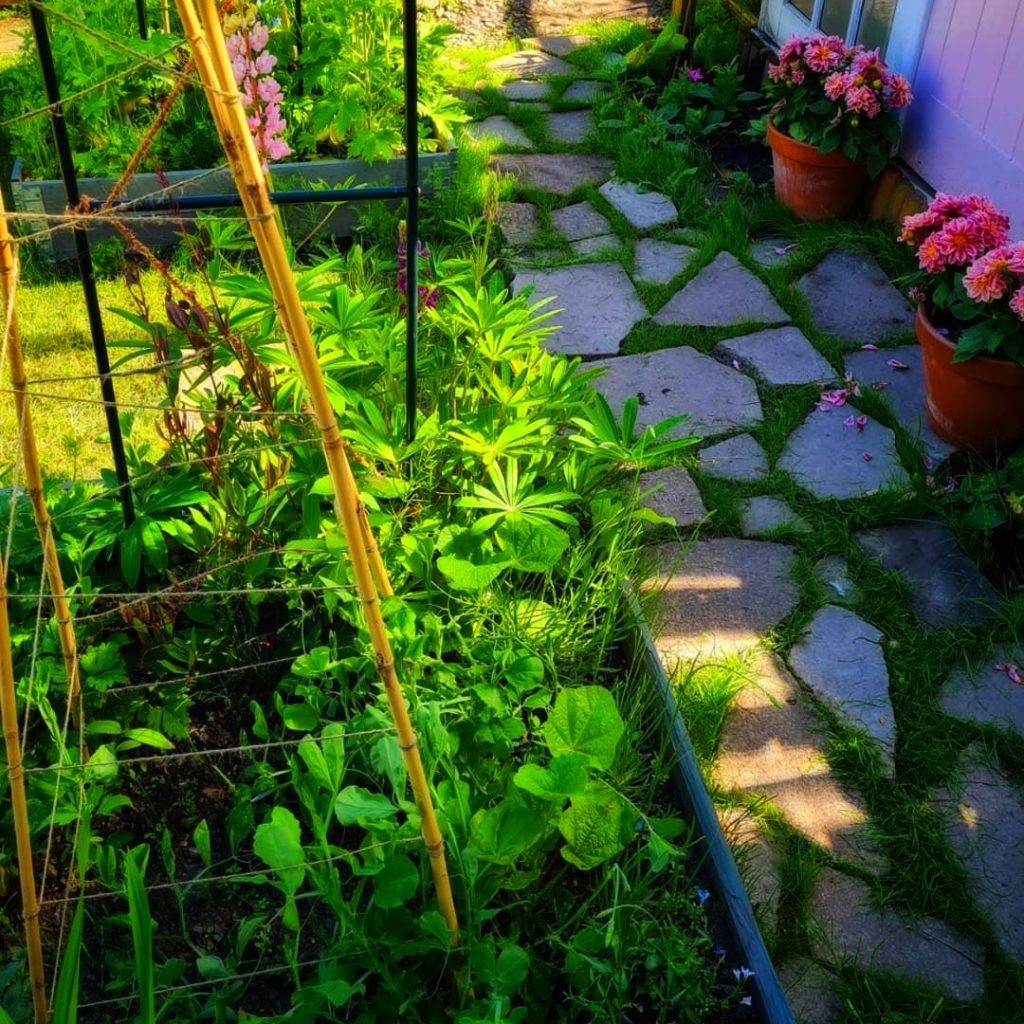
I wanted to grow grass between the cracks for a more naturally aged decayed look! I felt certain that any loose stones would be stabilised once the earth and grass between them was in place…I was right, 2 years on the path is as solid as a rock! There has also been no sinkage either. * Note – This is not a particularly high traffic path.
Laying The Crazy Paving
Before Laying The Broken Paving Stones, I cleared the area of any stones and weeds, then raked it over. I then laid the stones on top, making sure to leave small gaps in between. Some of the stones were too big for certain spaces-which is where the lump hammer and Chisel came in.
I simply placed the chisel on the stone I wanted to split, then whacked it with the hammer to break it in half (I found that part quite fun) What you are ultimately doing is creating a mosaic, a one of a kind creation, only you can make! An opportunity to be Creative!
Filling The Gaps
Fill a Wheelbarrow with some topsoil or dig up some dirt from your garden or allotment. Dump it on top of your Crazy paved path, then brush it into the gaps with a heavy garden brush or rake. Make sure every gap is filled and the stones are snug.

Let it Rest
Let the path rest overnight, allowing it a period of settling before you sow the grass seed
How to Sow Grass Seed
Affiliate Links
This is the Grass Seed I used- Buy GBW Grass Seed (GBW is a fast-growing grass seed. Hard-wearing and produces rapid germination with consistent growth)
With a hose lightly water the soil in the gaps (if it’s not already moist) Then sprinkle the Grass seeds evenly on top, make sure the soil always remains moist but not sodden. Leave to germinate, try not to step on it. (Around late April is a good time to sow Grass seed) You should begin to see grass shoots within 2 weeks.

New Life
In no time, little sprouts will begin to emerge. Look at those gorgeous little tufts of green! In a matter of weeks every little nook and cranny will be filled.

Let it Grow
The picture below is around 8 weeks later and the grass is already becoming established.
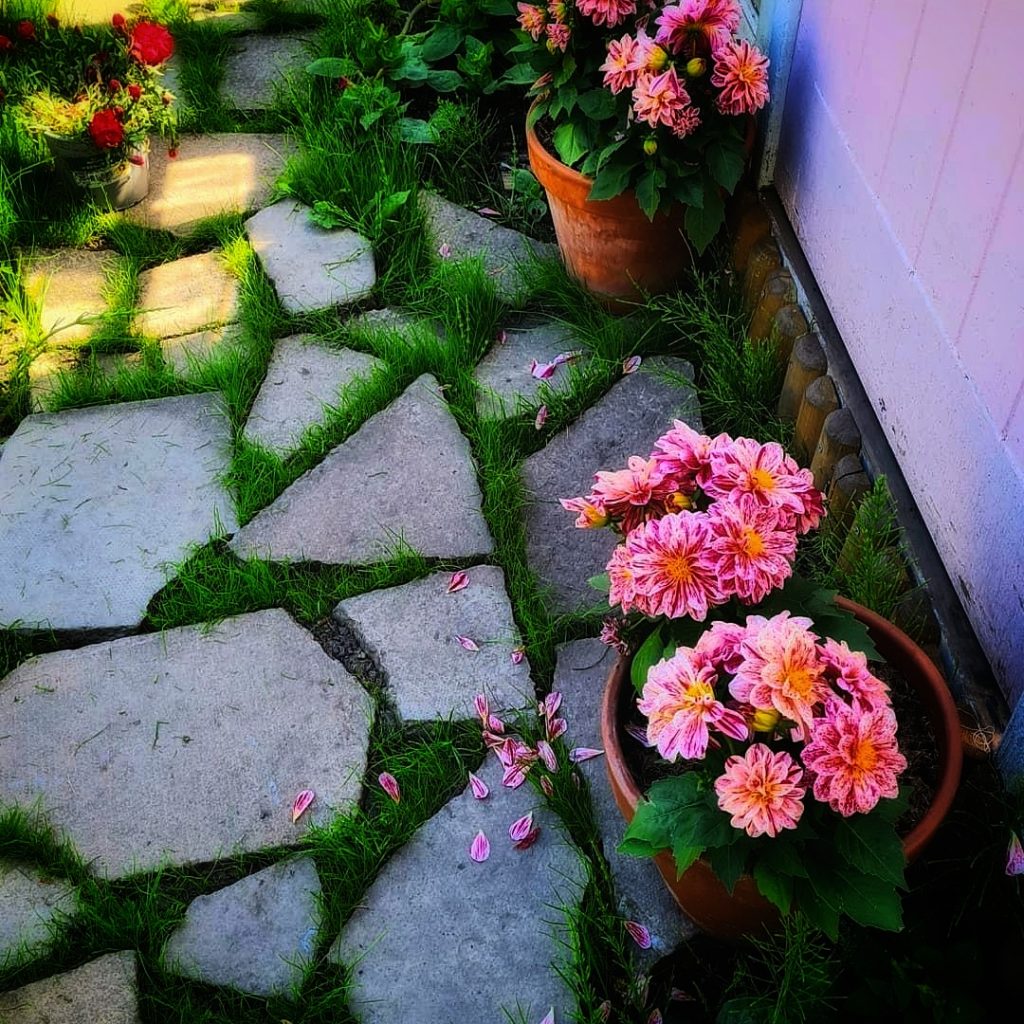
Ongoing Care
Very Little care is needed for maintaining this Crazy Paving path apart from trimming. This can be done with either a strimmer or lawnmower to keep it looking tidy.
Looking For more DIY posts ?
Looking For More Growing Posts?
Looking For more ‘Homely’ Inspo ?
Have a Nosey Around the Blog! See what i’ve been Baking, Growing and Drinking! Also, pop over and say Hi on Instagram


This is a brilliant idea. I’ve just got a new to me allotment and it’s a blank canvas so I intend to create a winding/curved path down the center of the plot to soften the straight lines i’ve made with raised beds. I did plan herbs and I will use some but grass will make an interesting variation.
Glad the post was helpful, it’s a very frugal way to create a path on an allotment 🌿